REMOVE, REPLACE OR SEPARATE BY LINE BREAKS (ALT ENTER) INCLUDING VBA

Alt Enter is known as a manual line break in Excel. It’s what you use when you want to have text show in multiple lines regardless the width of the column. But sometimes you need to insert or remove line breaks (Alt Enter) on a high level. Meaning that there are multiple line breaks you want to insert or remove at once. Firstly, let’s look at the Remove or Replace multiple Line Breaks at once.
Remove or Replace Line Breaks in Excel
The Remove and Replace part can be done with the Find and Replace tool, where the only trick you have to know, is to use the Ctrl+J or Alt+0010 (the 0010 has to be typed in the numeric part of the keyboard) combination in the Find Box.
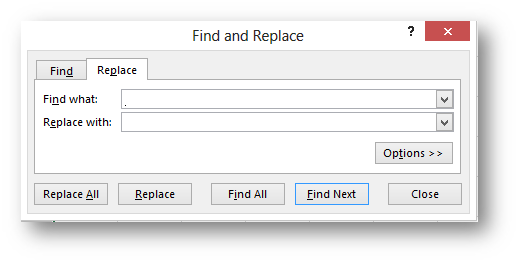
This gives you a blinking dot that represents a cursor that has dropped by one line and then if you leave the Replace with empty, you will remove the line breaks and if you put Space (or any character you want) in the Replace with box, all your line breaks will be replaced by spaces (or your selected character).
Remove or Replace Line Breaks (Alt+Enter) in Excel with VBA
First of all, this code works with the Selection, so it will only execute on the selected cells. And the other thing is, this code turns off the Wrap Text command. More or less this is done so you can easily see the effect of the code but it’s also there for practical reasons. If you don’t like that, just comment out the second line of code. The code itself is very simple and actually utilizes the Excels Find and Replace Tool. The Remove VBA is very simple…
 Sub RemoveLineBreak()
Selection.WrapText = False 'Removing Wrap Text
Selection.Replace What:=Chr(10), Replacement:="", LookAt:=xlPart, _
    SearchOrder:=xlByColumns, MatchCase:=False, SearchFormat:=False, _
    ReplaceFormat:=False
End Sub
The replace code is identical except for the Your Text Here part. So just replace that with the desired replacement text
 Sub ReplaceLineBreak()
Selection.WrapText = False 'Removing Wrap Text
Selection.Replace What:=Chr(10), Replacement:="Your text here", LookAt:=xlPart, _
    SearchOrder:=xlByColumns, MatchCase:=False, SearchFormat:=False, _
    ReplaceFormat:=False
End Sub
But now for the crown jewel of this post… The Separate By line breaks.
Separate By Line Breaks (Alt+Enter) in Excel
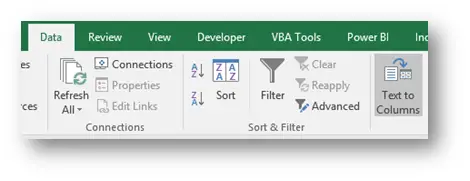
The easiest way in Excel is to use the Data/Text to Columns command.
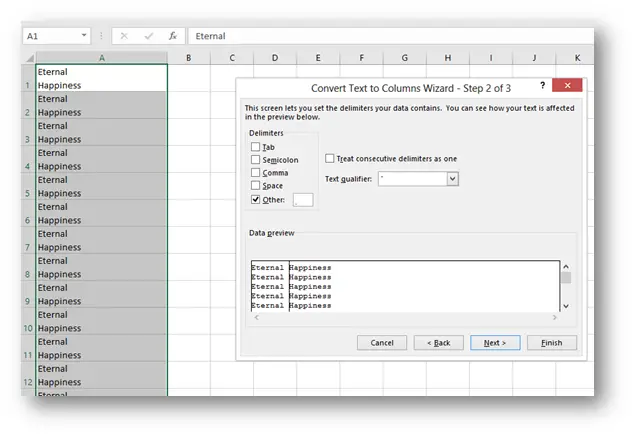
Where in Step 2 of the Wizard, you select Other and again, either use the Ctrl+J or Alt+0010 key combination to insert the line break (Alt+Enter). Same as in the previous samples, this will give you the blinking cursor dot… But in the data preview you can easily see that this will result in more than One column. Keep in mind that this command will behave the same as it always does, even if you separate by line breaks. It will overwrite any data in those columns.
Click Finnish and you get
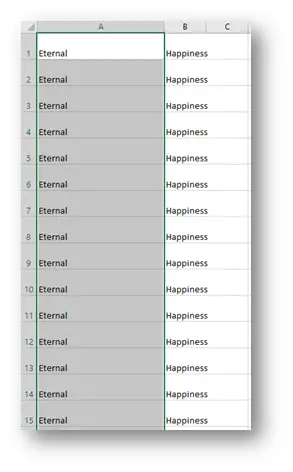
Simply brilliant but still over 4 clicks J. That brings us to the VBA part…
Separate By Line Breaks in Excel with VBA
So the code just simulates the above command (Data/Text To Columns) but with less effort on your part. It’s very important that you realize, that this code (although in full working state) is only the center piece, there’s a lot of error handling and loss of data warnings that you must put in place for this code to be “all it can be”. It goes without saying that in our AddIn, all those safeties are in place. The only safety in this case is some error handling if the data would have to be written out of bounds. Here is the code.
Sub SeperateBy()
On Error Resume Next
    Application.DisplayAlerts = False
    Set Rng2 = Range(Selection.Item(1).Address)
        Selection.TextToColumns Destination:=Rng2, DataType:=xlDelimited, _
        TextQualifier:=xlDoubleQuote, ConsecutiveDelimiter:=False, Other:=True, OtherChar:=Chr(10), FieldInfo _
        :=Array(1, 1), TrailingMinusNumbers:=True
                        If Err.Number = 1004 Then
                            ui = MsgBox("You will now stop the execution of the code", vbOKOnly)
                                If ui = vbOK Then
                                Application.ScreenUpdating = True
                                Exit Sub
                                End If
                        End If
Application.DisplayAlerts = True
End Sub
And with this, we are one step closer to eternal happiness.
And also, if there is a command or a functionality that you miss in Excel, write it in the comment section bellow or give me a shout over the contact form, and I will write about it in one of the next posts on Excel Unplugged. J.
Related Posts
- November 30, 2021
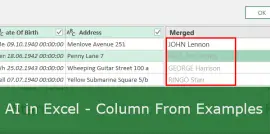
Welcome back to Artificial Intelligence in Excel! In Part 1, ...
- November 2, 2021
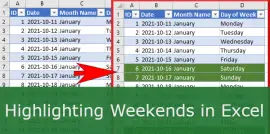
Highlighting Weekends can be hard in Excel. So just for fun, ...
- September 14, 2021
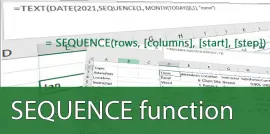
The Excel SEQUENCE function In this article, we’ll ...

- September 10, 2019
Last year, Microsoft announced the introduction of a new group of ...
Excel Unplugged acknowledgements


Donate