Creating a Dynamic Calendar for Your Data Model

This article will take care of the most fundamental need when it comes to Power Pivot or even Power BI and Time Intelligence. Having a Date Table (Calendar Table) is vital to any such endeavors. Mostly this Calendar tables were created in Excel using a Fill/Series command but doing it this way, was always going to be a hassle since you either had to update it every day (week, month, year…) or you had many unused dates, that you put there in advance. This post will show hot to use Power Query to create a dynamic calendar that will create a list of all dates from the first date in your data, to the last. Here’s how…
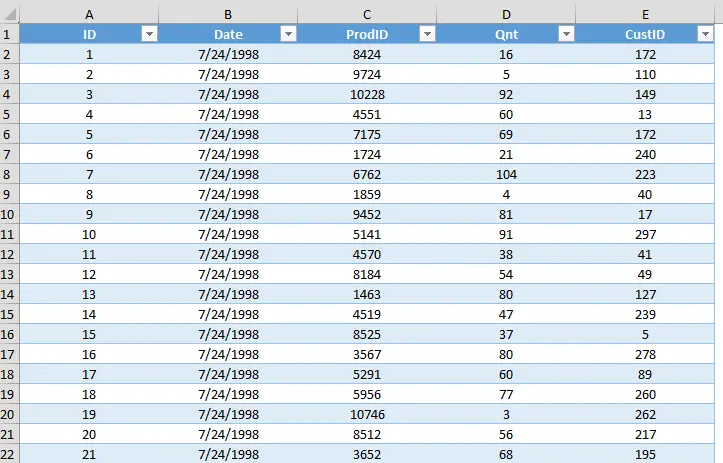
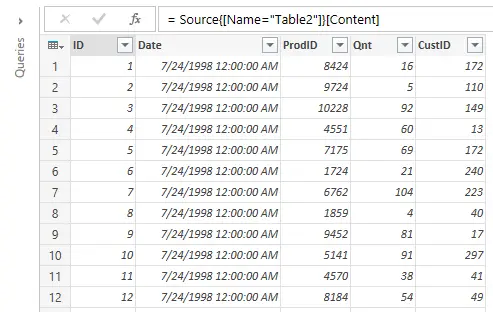
For this sample, I will get data from an Excel Table, but where we get our data has no effect on our future actions.
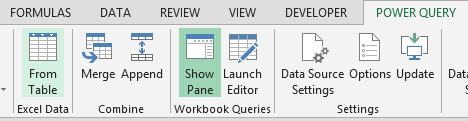
One way (the easy way) to kick things off is to be within our table and choose POWER QUERY/From Table
And we get a simple Query.
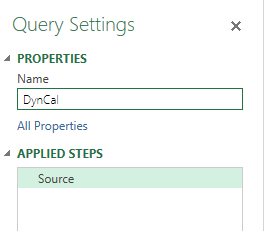
Now if you really wanted to complicate things, you could instead go through three steps. First you go to POWER QUERY/From Other Sources/Blank Query.

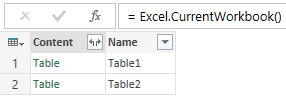
Then simply start typing =Excel.CurrentWorkbook() in the Formula Bar.
![]()
The second step requires you to choose the correct table from the content of your workbook.
In step three, you simply check if you got what you wanted.
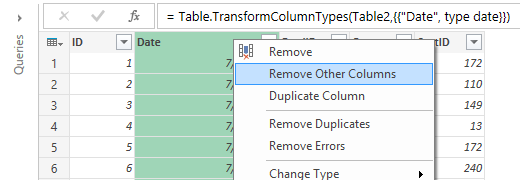
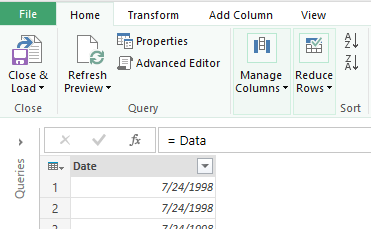
I’m guessing you have all chosen the second method J But the reason I decided to give you both options, is that if your data was not in a table form, then you would have to use the second option to get named ranges or just data from a certain sheet that was not in a table form. But either way, you are now ready to start the process. The first thing to do is to get rid of all unnecessary data. That is all but the Date column. We do this by selecting the Date column.

Now we right click and choose Remove other Columns.
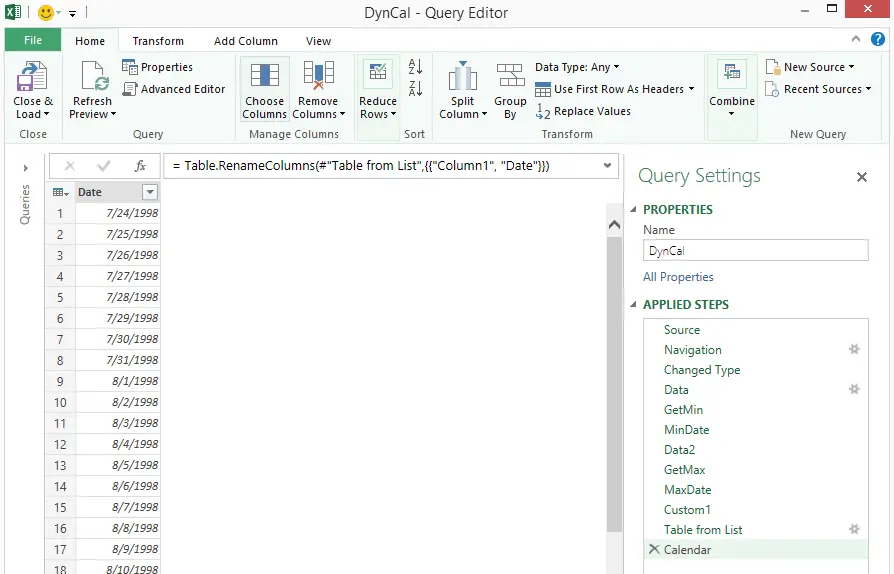
Now we get a new step that we should, for the sake of transparency and later editing of the query, rename.

We do this by Right clicking the step and choosing Rename. Rename the step to Data. Now we go to the filter in the Date Column and choose Sort Smallest to Largest. Then we rename this new step.
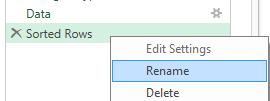
Let’s give it a new name and call it GetMin.
Now we create a new step by clicking on the fx icon or the Add Step icon.
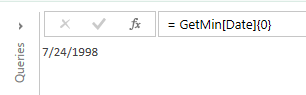
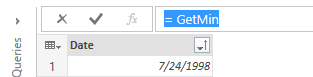
In the blank Step write =GetMin[Date]{0} and this told the Power Query to do this, go to the GetMin step, Date column and give me the first piece of data from that Column.
Now we get the date that we need and it’s paramount that we give this step a name that will from here on out give us the ability to call the first date of our data. I will call this step MinDate. Now we should get this.
Now it seems we’ve reached the end of the road since we came from the entire table to just one value. But now we wish to sort of repeat the process with a slightly different outcome. The outcome in this case being the last date…
To sort of start over, we just click on the fx icon (Add Step) and write =Data.
And here we are again with our starting point.
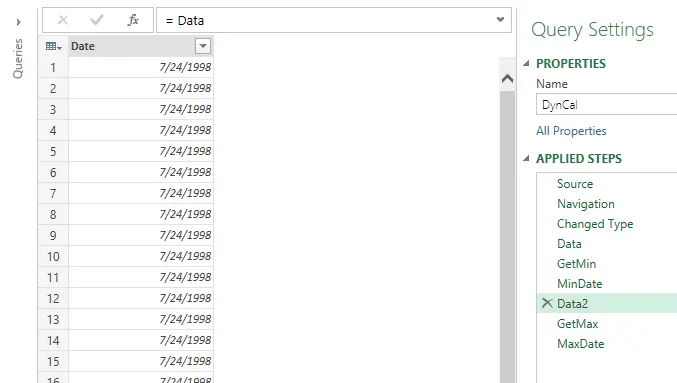
Rename this step to Data2 and now we sort our Date column Largest to Smallest which will bring our latest date to the top of the column. Rename that step to GetMax. Now if we only had a way to get the first date from this column. Well it’s just the same as with the MinDate above but the source step is different. So we create a new step with the fx button and write =GetMax[Date]{0}. We now rename this step to MaxDate. We should now see the following.
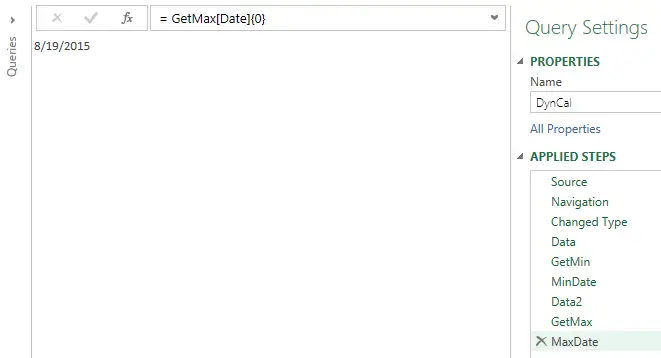
With this we have everything we need. We have the MinDate, we have the MaxDate. And now for the final piece of magic to tie them all together. We insert a new step and write
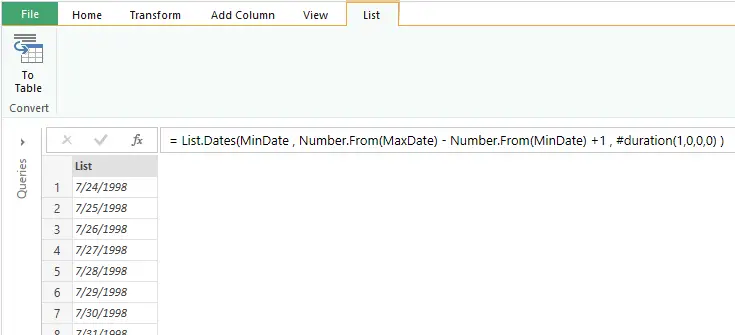
= List.Dates(MinDate , Number.From(MaxDate) – Number.From(MinDate) +1 , #duration(1,0,0,0) )
Be very careful, the M language is case sensitive! So List.Dates is not the same as List.dates!!!!!
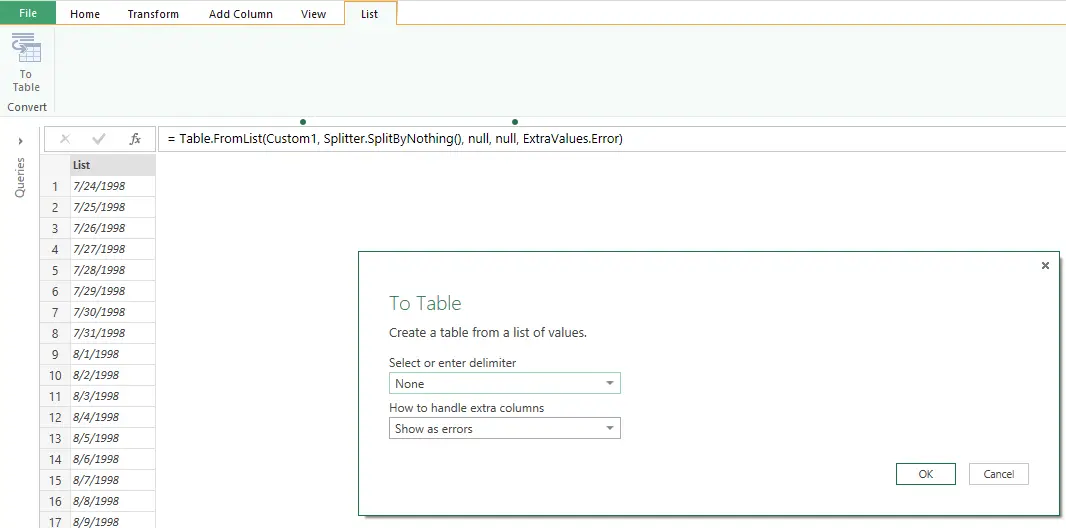
And this little piece of magic creates a continuous list of Dates from MinDate to MaxDate which is exactly what we need but at this point it’s a list. We have created this list with the List.Dates function. We now have to convert this List to a Table. And the right command is starring us in the face. Convert to Table and you don’t need to change the delimiter and extra columns settings.
Now we get a Table with one column that gets a Generic name and our next step is to change that name.
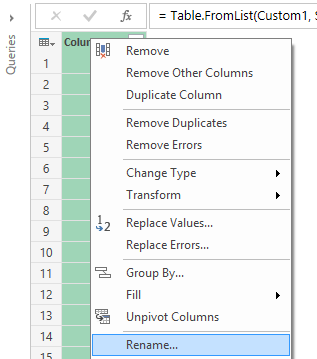
We then rename this column to Date and rename the last step to Calendar and there it is…
Now we just Close and Load to our Data model (Power Pivot).
Eternal happiness.
Most of the Ideas in this post were gathered from a true Excel Guru Ken Puls and his new book called M Is for (Data) Monkey which if you are even thinking about Power Query is the book to read! You can get it here.
Related Posts
- November 16, 2021
We’re continuing our quest for beautiful and dynamic ...
- November 9, 2021
Let’s look at some crucial tools for creating polished ...
- April 28, 2020
We often work with large datasets containing multiple columns, ...
- April 14, 2020
How to get the top 10 values in a table, and an aggregate for all ...
Excel Unplugged acknowledgements


Donate